One of the most common leftovers in Indian households is rice. It’s difficult to figure out beforehand how much you will need. If it falls short, making it all over again is really time-consuming; so one normally cooks more, just to be on the safe side – and that’s how one invariably ends up with leftover rice.
Since leftover rice cannot (indeed, should not) be reheated and served, most people are compelled to throw it away. To avoid such wastage, today’s post explores a delicious snack item that can be made quickly and easily with leftover rice. We are going to use some sparkling culinary creativity to turn the leftover rice into delicious Rice Bonda.
Here are the ingredients that you will require.
Ingredients:
Cooked Rice: 300 grams
Onion: 1, large
Green Chillies: 2
Curry Leaves: 12
Gram Flour (Besan): 3 tablespoons
Mustard Oil: 100 millilitres
Lemon Juice: 1 tablespoon
Cumin (Jeera) Seeds: 1 teaspoon
Red Chilli Powder: 1 teaspoon
Turmeric (Haldi) Powder: Half a teaspoon
Garam Masala: Just a pinch
Black Pepper Powder: Just a pinch
Salt: to taste
The quantities mentioned above are for serving four persons (four plates of Rice Bonda). Adjust the quantities proportionately to suit the number of servings you require.
Preparation:
Wash, peel and finely chop the onion.
Finely chop the green chillies.
Finely chop the curry leaves.
Method:
Take the cooked rice in a mixing bowl and mash it – you could use either your hands or a large spoon.
Add the onion, green chillies, curry leaves, gram flour, lemon juice, cumin seeds, red chilli powder, turmeric powder, garam masala, black pepper powder and salt. Mix well. Mixing with a spoon may be a little difficult because the cooked rice is sticky, so it’s best to use your hands to mix the cooked rice and spices thoroughly.
Use your hands to shape portions of the mixture into palm-sized balls. Keep aside.
Heat the Mustard Oil in a pan on Medium heat. When the oil reaches its smoking point and starts giving off whiffs of pungent white smoke with the strong aroma of mustard wafting gently across your kitchen, start the deep-frying process.
Deep-fry the rice balls in small batches to ensure even frying on all sides. When the rice balls take on a golden brown colour, remove them from the pan and place them on paper towels to drain the excess oil. While this is a standard practice for deep-fried foods, you can skip this step if you want. That is because we have used healthy cold-pressed Mustard Oil that is proven to be absorbed in food in very small amounts while deep-frying. Also, Mustard Oil is an exciting taste agent and lends a characteristic zingy flavour to the rice balls.
Your Rice Bonda is now ready. Serve it hot with ketchup, mustard sauce, tamarind chutney or any other condiment of your choice. Leftover rice – gone, and you are left with a delicious snack that you can enjoy with a hot cup of tea or coffee.
One of the most popular items among Indian teatime snacks and street foods is the Samosa. There are subtle regional variations in the recipe all across India depending on tastes, preferences and the seasonality of key ingredients. In most parts of North India, the Samosa is usually a hot, spicy snack while in Bengal it could even turn out to be sweet! Yes, Bengalis actually have a sweet Samosa which they call KheererSingara (a Samosa stuffed with Kheer, as the name implies).
Here’s a surprising fact: in spite of being a popular Indian snack for thousands of years, the Samosa did not originate in India. Food historians have traced the origins of this food to ancient Persia where it was called Sanbusak. Even today, in the Middle East you can find a similar triangular fried snack called Samsa which is very similar to our Samosa.
Interestingly, the Persian version of the Samosa was non-vegetarian – it used meat fillings. In fact, certain parts of India like the South Indian states and Bengal have similar non-vegetarian versions using minced meat (Keema) as the main filling.
So how did this Persian snack reach India? Around the 13th Century, chefs from Persia began visiting the courts of the Delhi Sultanate to share their culinary secrets with royal patrons in India. In his writings, the well-known poet and scholar Amir Khusro mentions the meat-filled version of the Samosa as a favourite among the nobles. Later, in the 14th Century, the famous traveller and writer Ibn Batuta provides an accurate description of how the Samosa was served in the court of Mohammed bin Tughlaq. It was an appetizer served immediately after the Sherbet and before the main course.
Again in the 16th Century, Abul Fazal, the court historian of Emperor Akbar describes the Samosa in Ain-i-Akbari, a detailed chronicle of life during the Mughal era. His writings tell us that in Akbar’s time, the Samosa was no longer a delicacy restricted to the royal kitchens and was enjoyed by people all over India.
So that’s the Samosa Story – from an ancient Persian delicacy to a regal snack in the Mughal courts and finally, spreading far and wide to become a popular teatime snack and an eagerly sought after street food all over India.
Today’s post is about the traditional Indian version of the Samosa that has been one of our favourite snacks across generations. The recipe that we will explore looks at the North Indian style of making Samosas embellished with rich spices and fried in cold-pressed Mustard Oil.
Let begin by gathering the ingredients that you will require.
Ingredients:
Potatoes: 500 grams
Peas: 50 grams
All-purpose Flour (Maida): 250 grams
Mustard Oil: 200 millilitres
Carom (Ajwain) Seeds: 1 teaspoon
Ginger (Adrak) Paste: 1 tablespoon
Green Chillies: 2
Asafoetida (Heeng): Just a pinch
Lemon Juice: 1 tablespoon
Coriander (Dhania) Leaves: 4 tablespoons
Cumin (Jeera) Seeds: 1 teaspoon
Garam Masala: 1 teaspoon
Red Chilli Powder: 1 teaspoon
Fennel (Saunf) Powder: 1 teaspoon
Salt: to taste
The quantities mentioned above are for making 10 Samosas (five plates in street food parlance). Adjust the quantities proportionately to suit the number of Samosas you require.
Preparation:
Peel, wash and boil the potatoes till they are done – use a fork to check. Ensure that they don’t become pulpy or too soft. When your potatoes are done, crumble them (don’t mash them). Keep aside.
Finely chop the green chillies.
Finely chop the coriander leaves.
Prepare the dough for your Samosas: in a mixing bowl, take the flour, carom seeds, salt (a teaspoon should be enough) and 60 millilitres of Mustard Oil. Mix the flour well to ensure that the oil gets evenly blended with the flour. As a test, take a handful of the flour and compress it with your fingers. When you release your grip, the flour should not crumble and fall apart. If it does, add a little more oil and mix again. When the flour is ready, add water – a little at a time – and mix to form hard, stiff dough. Cover the dough with a damp towel and keep aside for around 30 minutes.
Next, let’s make the potato filling for the Samosas: heat two tablespoons of Mustard Oil in a pan. Add the cumin seeds. When the seeds begin to splutter, add the ginger and sauté for a couple of minutes. Next add the asafoetida, garam masala, red chilli powder and fennel powder and continue to sauté. After around 30 seconds, add the potatoes along with the peas, coriander leaves and salt to taste. Stir to mix well and sauté for around 3 minutes. Then turn the flame off and let the contents cool down to room temperature. Add the lemon juice and mix well. Keep aside.
Method:
Knead the dough and divide it into five equal portions. Use your hands to roll each portion into a palm-sized ball.
Coat the rolling pin and the rolling board with a little oil. Place a ball of dough on the rolling board and drizzle a bit of oil on it. Then roll it into an oval shape that’s around 9 inches long and 7 inches wide. Don’t roll it too thin – but not too thick either. Next use a kitchen knife to cut the oval piece laterally into two equal parts. Each part will be used for making one Samosa. Once you are done, you should have 10 semi-oval pieces of rolled dough.
The straight edge of each piece should be thin. If it is thick, apply the rolling pin once again to make it thin.
Now use your fingers to apply water on the straight edges of the dough pieces. Carefully fold the dough to form a cone shape, bringing the straight edges together in a straight line. Press the edges from the outside and the inside so that they are firmly stuck and do not come apart.
Fill the cone-shaped dough with the potato filling. Then apply water to the edges (on the open side of the cone) and press them to form a pleat. Pull the pleat over and seal it firmly by pinching it.
Repeat this process for the remaining nine pieces of dough.
Heat the remaining Mustard Oil in another pan on Medium heat. When the oil reaches its smoking point and emits puffs of aromatic (and pungent) white smoke, turn the flame down to Low.
Deep-fry the Samosas in batches. Take your time. There is no need to rush this part of the process. It will take around 10 minutes for the crust to become firm. When this happens, increase the flame to Medium and keep frying. Turn the Samosas over to ensure even frying on all sides.
When the Samosas become crisp and take on a golden yellow colour, remove them from the pan and place them on paper towels to drain the excess oil.
Your Samosas are now ready! Serve them hot with tomato ketchup, tamarind chutney or any other condiment of your choice. Your homemade Samosas are healthier than their street food counterparts because they are prepared hygienically in your kitchen and they are made with cold-pressed Mustard Oil which is one of the healthiest cooking oils for deep-frying.
When celebrity Chef Rick Stein began his great Indian culinary adventure as part of his television series for the BBC, he thought the most challenging flavour he’d be up against would be the fiery Indian curry. But he eventually discovered something more fiery in the city of Calcutta (now Kolkata) – a hot, sharp, pungent cooking medium called Mustard Oil.
Initially, Stein couldn’t quite figure out what to do with an ingredient that had such a definitive taste and character, but seeing how popular it was in Indian cooking, he laboured on, trying to understand the oil and its uses. Eventually, Chef Stein got hooked on to the flavour and texture of Mustard Oil and realized that it was an acquired taste. And once he got used to it, he began appreciating its versatility, uniqueness and centrality in Indian cooking.
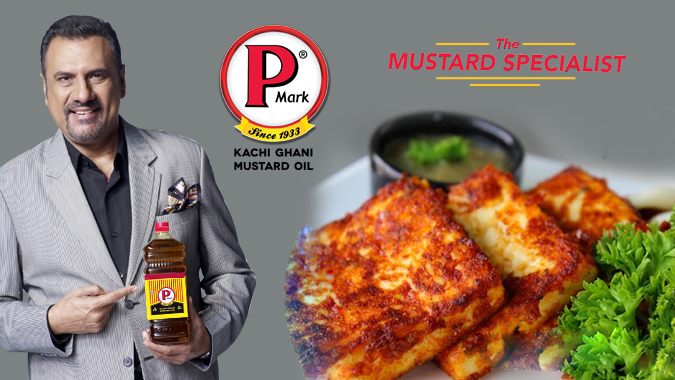
Today, we are going to make one of the many dishes that Chef Stein experimented with during his Indian sojourn. This is a popular snack (or appetizer) called Pan Fried Garlic Paneer.
Here are the ingredients that you will require.
Ingredients:
Indian Cottage Cheese (Paneer): 200 grams
Mustard Oil: 50 millilitres
Corn Flour: 1 teaspoon
Red Chilli Powder: Half a teaspoon
Garlic (Lasun) Paste: 1 teaspoon
Chilli Sauce: 1 tablespoon
Butter: 25 grams
Black Pepper Powder: Just a pinch
Salt: to taste
The quantities mentioned above are for serving four persons. Adjust the quantities proportionately to suit the number of servings you require.
Preparation:
Cut the Paneer into bite-sized cubes. Soak the cubes in warm water for around five minutes. Then drain the water and keep aside.
Melt the butter.
Method:
In a mixing bowl take the corn flour, red chilli powder, garlic paste, chilli sauce, black pepper powder and salt. Mix well. Then add the melted butter and mix again.
Next, add the Paneer cubes to the bowl and mix ensuring that all the Paneer pieces are evenly coated. Once this is done, keep the mixing bowl aside for around 30 minutes, allowing the Paneer to marinate.
Heat the Mustard Oil in a pan on Medium heat. When the oil reaches its smoking point and emits puffs of aromatic (and pungent) white smoke, turn the flame down to Low. Your oil is now ready for frying.
Fry the marinated Paneer pieces on Low heat for around five minutes. Ensure that the pieces are evenly fried on all sides. Remove the Paneer from the oil and arrange the pieces on a serving dish.
Your delicious Pan Fried Garlic Paneer is now ready. Serve it hot – and watch it vanish in the blink of an eye!
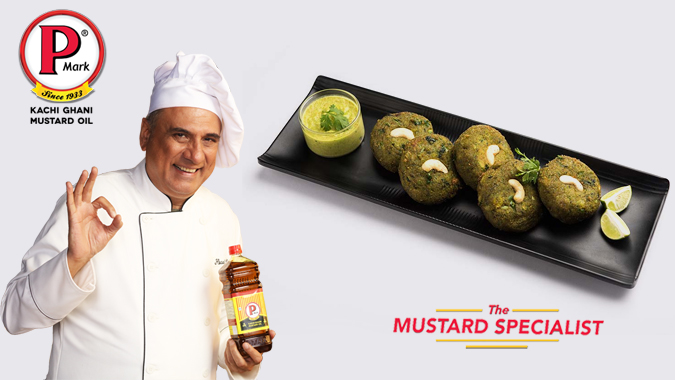
The word “Kebab” has its origins in the ancient civilizations of Mesopotamia and Persia, and has always been synonymous with meat. Even today it is largely seen as being a non-vegetarian food lover’s delight. But there is one traditional Kebab that is specially meant for vegetarians – the Hara Bhara Kebab that gets its name from its rich green ingredients, spinach and peas (Hara means green).
In today’s post let’s explore an exciting homemade version of the Hara Bhara Kebab. You won’t need a charcoal tandoor and skewers for this recipe. It has been adapted to suit a modern kitchen – but no compromise has been made in terms of flavour, authenticity and enjoyment.
The ingredients that you will require are listed below.
Ingredients:
Spinach (Saag): 100 grams
Potatoes: 2, medium sized
Peas: 150 grams
Gram Flour (Besan): 4 tablespoons
Mustard Oil: 6 tablespoons
Green Chilli: 1
Ginger (Adrak): A small one-inch piece
Dry Mango Powder (Amchur): 1 teaspoon
Chaat Masala: 1 teaspoon
Garam Masala: Just a pinch
Salt: To taste
The quantities mentioned above are for serving four persons with two kebabs each. Adjust the quantities proportionately to suit the number of servings you require.
Preparation:
Take around 500 millilitres of water in a pan and chill it in the refrigerator.
Boil around 500 millilitres of water in another pan. Once the water starts boiling, turn the flame off. Put the spinach in the hot water for around two minutes, making sure it is fully immersed. Carefully remove the spinach from the hot water (it is best to use tongs for this) and place the spinach in the chilled water for a minute or so. Then remove the spinach from the cold water and drain thoroughly to remove all the water. You could use your hands to gently squeeze any residual water out. When this is done, finely chop the spinach and keep aside.
Lightly dry-roast the gram flour in a pan and keep aside.
Wash, boil and peel the potatoes. Use a fork to check that they are done.
Boil the peas – to save time you can do this in the same pan along with the potatoes.
Grate the boiled potatoes and then mash the potato pieces and peas using the back of a tablespoon or a ladle.
Finely chop the ginger and the green chilli. Then use a mortar and pestle to make a paste of the ginger and green chilli.
Method:
In a mixing bowl add the spinach, the mashed potatoes and peas, and the ginger-green chilli paste. Mix well.
Next, add the roasted gram flour, dry mango powder, chaat masala, garam masala and salt. Mix well to ensure that the spices mix evenly with the mashed potato-peas mixture.
Divide the mixture into eight equal portions. Use your hands to shape each portion into a round shape like a Tikki (croquette).
Heat the Mustard Oil in a frying pan on a Medium flame. When the oil reaches its smoking point and starts emitting puffs of aromatic whitish smoke, reduce the flame to Low.
Fry each Tikki till it takes on a golden brown colour. At regular intervals turn the Tikki over to ensure even frying on both sides. Repeat the same process for the remaining Tikkis. Depending on the size of your frying pan you can fry two or three Tikkis at the same time – but make sure they don’t get burnt.
Your Hara Bhara Kebab is now ready. Serve them hot with tomato ketchup or any chutney of your choice. It’s a great idea for a teatime snack – or you could even serve them as a side dish with meals.
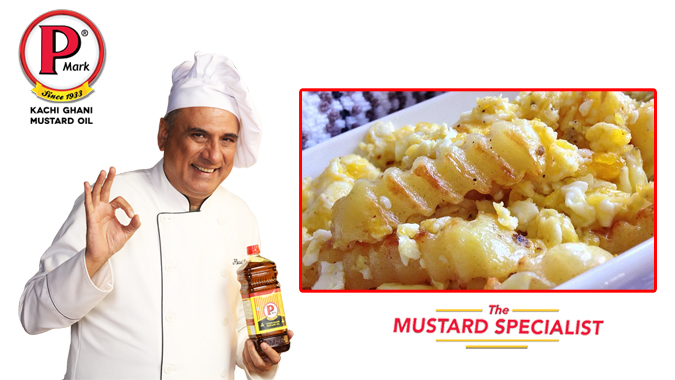
Our quest for exciting snacks leads us to a quick egg-based recipe today. If you are an egg-lover, you will love this one! It’s called Egg and Cheese Fries.
Here are the ingredients that you will need.
Ingredients:
Eggs: 6
Cheese, grated: 100 grams
Onion: 1, medium sized
Tomato: 1
Mustard Oil: 50 millilitres
All Purpose Flour (Maida): 150 grams
Corn Flour: 1 tablespoon
Breadcrumbs: 100 grams
Red Chilli Flakes: 2 tablespoons
Black Pepper Powder: 2 teaspoons
Salt: 2 teaspoons
The quantities mentioned above are for serving four persons with three pieces each. Adjust the quantities proportionately to suit the number of servings you require.
Preparation:
Boil the eggs, remove the shells and slice each egg vertically down the middle. Remove the yolk from the eggs and gather it (the yolk) in a bowl.
Finely chop the onion.
Finely chop the tomato.
In a mixing bowl, add the flour, corn flour, black pepper powder, a tablespoon of red chilli flakes and a teaspoon of salt. Mix well. Add water, a little at a time, to create a smooth batter. Keep aside.
Spread the breadcrumbs on a tray or a plate.
Next, let’s prepare the stuffing for your Egg and Cheese Fries. In another mixing bowl, add the egg yolk (that you had kept aside earlier from the boiled eggs) along with the onion, tomato, grated cheese, a tablespoon of red chilli flakes and a teaspoon of salt. Mix well and keep aside.
Method:
Take each halved slice of egg and dip it in the batter. Then roll the egg in the breadcrumbs ensuring the piece gets evenly coated. Do this for all 12 pieces of egg.
Heat half the Mustard Oil (around 25 millilitres) in a frying pan on a Medium flame. Fry each batter and breadcrumbs-coated piece of egg till it turns golden brown in colour. Ensure even frying on both sides.
Let the fried pieces cool down till you can comfortably touch them.
Next, fill the cavity of each fried piece of egg with the stuffing.
Take the remaining Mustard Oil in another pan. Carefully place the stuffed egg slices in the pan with the stuffing side up. Cover the pan and let the contents cook on a Medium flame for around 5 minutes or so. Then turn the flame off.
Your Egg and Cheese Fries are now ready. Serve them hot with ketchup or chilli sauce. And if you want to heighten the flavour of cheese, sprinkle some grated cheese over the tops of the fries before serving.
Foodies are always on a quest for something new… something different! So in today’s post we are going to make an exciting snack that’s a fusion of European and Indian culinary styles – a delicious item called Cheese and Potato Sticks.
Here are the ingredients that you will require – very simple ingredients; this makes it possible to prepare this recipe quickly and easily.
Ingredients:
Potatoes: 3, medium sized
Cheese: 100 grams
Onion: 1, small
Flour: 2 tablespoons
Eggs: 2
Mustard Oil: 4 tablespoons
Breadcrumbs: 50 gram
Black Pepper Powder: Half a teaspoon
Salt: to taste
The quantities mentioned above are for two servings. Adjust the quantities proportionately to suit the number of servings that you require.
Preparation:
Peel, wash and boil the potatoes. When they are done (use a fork to check) cut the potatoes into small pieces.
Peel, wash and finely chop the onion.
Cut the cheese into small strips, around half-an-inch in length.
In a mixing bowl, add the potatoes, onion, black pepper and salt. Use a fork to mash the potatoes and mix the ingredients well. Keep aside.
Method:
Use your hands to shape a portion of the potato mixture into a palm-sized ball. Flatten the ball into a round shape and place some cheese strips in the middle. Carefully roll the potato mixture around the cheese strips. Do this till all the cheese strips and potato mixture are used up. Keep aside.
In a mixing bowl, break and beat the eggs. Add the flour and mix well.
On a plate or a tray spread out the breadcrumbs.
Heat the Mustard Oil in a pan on a High flame till the oil reaches its smoking point and emits puffs of deliciously aromatic white smoke. Reduce the flame to Medium.
Now dip each potato mixture-coated cheese stick into the egg-flour mixture, and then roll it on the breadcrumbs making sure that each stick is evenly coated.
Now carefully fry each stick till it turns golden brown in colour. Place the fried sticks on paper towels to drain the excess oil, if any.
There you are! These unique and delightfully different Cheese and Potato Sticks are now ready to be served. Enjoy them with ketchup, mayonnaise or any other dip of your choice.
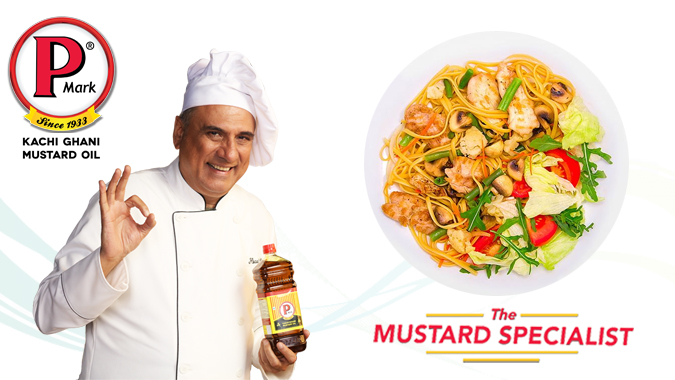
One of the most popular items at Indian roadside Chinese food eateries is a dish called Singapore Noodles. Its oriental name is also a lot of fun – it’s called Singapore Mei Fun which in Hindi means “Fun in Singapore”.
But here’s another fun fact: Singapore Noodles don’t come from Singapore! Food historians have not been able to find any evidence of the dish’s connection to Singapore. In fact, this dish originally comes from the Sichuan (or Szechuan as it is written in the Western world) province located in South West China. In the early fifties Cantonese chefs in Hong Kong began recreating this dish, and it spread to the rest of the world.
The Indian street food version of Singapore Noodles is nothing like its oriental counterpart. It uses Indian spices and, therefore, has a completely different taste… a unique flavour of its own. So in today’s post we are going to prepare a homemade version of this delightful street food item.
Let’s begin by gathering the ingredients that you will require.
Ingredients:
Rice Noodles: 150 grams
Mustard Oil: 4 tablespoons
Garam Masala: Half a teaspoon
Turmeric (Haldi) Powder: Half a teaspoon
Red Chilli Powder: Half a teaspoon
Coriander (Dhania) Powder: 1 teaspoon
Black Pepper Powder: Just a pinch
Onion: 1, small
Capsicum: Half
Carrot: 1, small
Garlic (Lasun): 6 cloves
Button Mushrooms: 200 grams
Green Chilli: 1
Soy Sauce: 2 teaspoons
Salt: to taste
The quantities mentioned above are for two servings. Adjust the quantities proportionately to suit the number of servings that you require.
Preparation:
Heat one litre of water in a pan till it begins to boil. Place the rice noodles in the boiling water; make sure the noodles are fully immersed. Cover the pan and let the noodles blanch for around five minutes. Pass the blanched noodles through a strainer to drain the water. Keep the noodles aside.
In a small mixing bowl add the garam masala, turmeric, red chilli powder, coriander, and black pepper powder. Use a spoon to mix the spices well. Keep aside.
Peel, wash and finely chop the onion.
Chop the capsicum into small pieces.
Dice the carrot.
Peel, wash and cut the garlic cloves into small slices.
Slice the button mushrooms.
Finely chop the green chilli.
Method:
Heat the Mustard Oil in a pan on a High flame till the oil reaches its smoking point and emits whiffs of aromatic white smoke. Reduce the flame to Medium.
Add the garlic and green chilli and sauté for around 30 seconds.
Next, add the onion and stir fry for a minute or so.
Now add the capsicum and carrot and continue to stir fry for around 2 to 3 minutes.
Next, add the button mushrooms and continue to stir fry. The mushrooms have a tendency of releasing moisture. Continue to stir fry till the moisture evaporates.
Reduce the flame to Low and add the spice mixture which you had earlier set aside in the mixing bowl. Mix well. Then add the soy sauce and mix well.
Increase the flame to Medium and add the rice noodles. Add salt to taste and stir fry the noodles for around 3 minutes. Ensure that the noodles mix well with the spices and soy sauce. Turn the flame off and remove the pan.
Your Indian street food-style Singapore Noodles are now ready. Arrange equal portions on two plates or in two bowls and serve hot. And rest assured that this “street food” item has safety and hygienically been cooked at home. Heightens the enjoyment, doesn’t it?
The exciting thing about Mustard Oil is that it adds a distinctive flavour to pretty much every dish you prepare with it – so it’s possible to take the simplest of ingredients and make them come alive with a dash of Mustard Oil. Let’s demonstrate this with a delicious snack that you can whip up at a lightning fast speed – in just 15 minutes.
The ingredients are few so it won’t take you much time to get them ready.
Ingredients:
Peanuts: 300 grams
Mustard Oil: 4 tablespoons
Garlic (Lasun): 10 cloves
Onion: 1, medium sized
Curry Leaves: 1 tablespoon
Red Chilli Powder: Half a teaspoon
Salt: to taste
The quantities mentioned above are for two servings. Adjust the quantities proportionately to suit the number of servings that you require.
Preparation:
Peel, wash and coarsely chop the garlic cloves
Peel, wash and finely chop the onion.
Coarsely chop the curry leaves.
Method:
In a frying pan, heat one teaspoon of Mustard Oil on a low flame and sauté the garlic for a minute or so. Then add the curry leaves and continue frying till the leaves turn crisp.
Add the remaining Mustard Oil to the frying pan. Add the peanuts and fry till they turn golden brown in colour.
Next, add the onion and continue frying for a minute or so.
Finally, add the red chilli powder and salt and stir to mix well.
And you’re done! Drain any excess oil that is left in the frying pan and transfer the fried peanuts, garlic and onions mixture to a serving plate.
Your quick-fix Fried Garlic Peanuts are now ready… a simple set of everyday ingredients brought alive by the characteristic flavour of cold-pressed Mustard Oil. These make an excellent teatime snack… or you could use them as munchies while watching television. Use your imagination!
There’s nothing French about the preparation that we refer to as French Toast. It gets its name from the chef who created it in 1724 – Joseph French. However, there are similar recipes that go back much further in time. A collection of Latin recipes called Apicius was compiled sometime in the 1st Century CE and it refers to a similar dish called Aliter Dulcia made using bread, milk and eggs. Food historians have also found references to another similar preparation dating back to the early part of the 5th Century CE in the form of a Roman dish called Pan Dulcis.
And yes – the French also had a similar dish called Pain Perdu, which translates rather curiously as “Lost Bread”… until one understands the story behind the name. In the 15th Century CE, France was facing severe food shortages. The people couldn’t afford to throw any food away – even stale bread that had turned hard and dry. Housewives would use milk and eggs to soften the bread and then fry it. The “lost” bread was thus recovered and consumed – hence the name: Pain Perdu.
In post-Independence India, in some cities like Delhi, Lucknow and Calcutta one could find an intriguing “Indianized” version of French Toast. In today’s post we will share a recipe for one such indigenous version that used to be a favourite breakfast dish and evening snack in some eateries located in Delhi’s Connaught Place. The menu at these eateries called the dish “French Toast” – but we think it would be far more appropriate to call it Indo-French Toast.
The ingredients that you will need are simple and few.
Ingredients:
Eggs: 4
Bread: 8 slices
Milk: 500 millilitres
Mustard Oil: 4 tablespoons
Onion: 1, medium sized
Green Chilli: 2
Cinnamon: A one-inch stick
Sugar: 2 teaspoons
Pepper: One large pinch
Salt: to taste
The quantities mentioned above are for serving four persons with two slices each. Adjust the quantities proportionately to suit the number of servings you require.
And even though there is thankfully no shortage of bread like in 15th Century France, somehow this dish comes out better if the bread you use is a couple of days old. Also, it’s better to use slightly thick slices of bread instead of thin ones.
In case the eggs you are using are small in size, increase the number from four eggs to six.
Preparation:
Finely chop the onion.
Finely chop the green chilli.
Coarsely grind the cinnamon.
Method:
In a mixing bowl break and beat the eggs to a smooth consistency. Next, add the milk, sugar, cinnamon, salt and pepper. Whisk the mixture and then add the onion and green chillies. Mix well.
Place each slice of bread in the egg mixture ensuring that the slice gets thoroughly coated and making sure that the mixture soaks into the bread slice.
Heat the Mustard Oil in a frying pan on a Medium flame. When the oil reaches its smoking point and starts emitting whiffs of aromatic white smoke, reduce the flame to Low.
Now fry each egg mixture-coated slice of bread, one at a time. Keep turning the slice over to ensure even frying on both sides. When the slice takes on a rich medium brown colour, remove it from the frying pan. Fry the remaining seven slices in the same way.
Your Indo-French Toast is now ready. Serve it hot. A steaming cup of tea or coffee alongside this dish is a great way to start a lazy Sunday morning… or to bring the curtain down on a busy day with an exciting snack to nibble on at teatime.
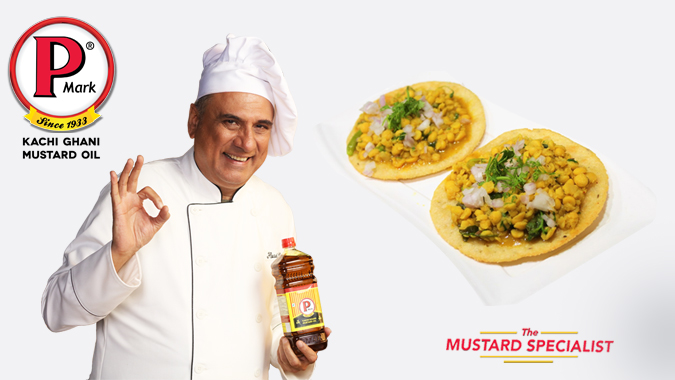
The dish that we will be making today is actually a Sindhi breakfast recipe, very popular across Rajasthan. The dish we are referring to is called Dal Pakwan. Believe it or not, the Sindhi community even has a World Dal Pakwan Day that’s celebrated on the 11th of April each year!
For all you Chaat fans out there, we are going to make a fun version of this dish; it’s called Dal Pakwan Chaat – a truly delightful evening snack. We strongly recommend that you try this as an accompaniment for your evening tea.
The ingredients that you will require for preparing this delicious Dal Pakwan Chaat are given below.
Ingredients:
Plain Flour (Maida): 150 grams
Semolina (Sooji): 30 grams
Split Chickpea Lentils (Chana Dal): 100 grams
Mustard Oil: 9 tablespoons
Cumin (Jeera) Seeds: 2 teaspoons
Green Chilli: 1
Ginger (Adrak): One half-inch piece
Turmeric (Haldi) Powder: One large pinch
Mango Powder (Amchur): One large pinch
Garam Masala: Just a pinch
Tamarind (Imli) Chutney: 3 tablespoons
Black Pepper: Just a pinch
Salt: To taste
The quantities mentioned above are for six servings. Adjust the ingredients proportionately to suit the number of servings you require.
Preparation:
Finely chop the ginger.
Finely chop the green chilli.
Wash and soak the lentils in around 750 millilitres of water for two hours.
Method:
Let’s start by making the puris. In a mixing bowl add the flour, a pinch of cumin seeds, the semolina and two tablespoons of Mustard Oil along with a pinch of salt. Add enough water (a little at a time) to make dough. Knead the dough well and keep aside for around 15 to 20 minutes.
Divide the dough into twelve equal portions, and roll each portion into circular shapes that are around 3 inches in diameter. When you are rolling the portions of dough, if it sticks to your rolling pin just add a little bit of oil (a few drops will suffice) to the dough and also coat the rolling pin with a bit of oil.
Use a fork to prick holes in the circular pieces of dough – this will ensure that your puris will be crisp after frying.
Heat five tablespoons of Mustard Oil in a frying pan on Medium heat. Once the oil reaches its smoking point and emits whiffs of aromatic white smoke, turn the flame down to Low.
Fry the circular pieces of dough, turning them over at regular intervals to ensure even frying on both sides. Fry in batches to ensure that your puris don’t get burnt.
Once the frying process is complete, turn the flame off and place the puris on paper towels to drain the excess oil. You could treat this step as an optional one since we are using cold-pressed Mustard Oil for making this dish. Not only is this oil healthy, it is also proven to be minimally absorbed in the puris while frying.
Let us now move on to making the Dal (lentils) for our Dal Pakwan Chaat. Drain the water from the split chickpea lentils that you had earlier soaked and kept aside.
Take the remaining Mustard Oil in a pressure cooker and heat on a Medium flame. To the hot oil add the remaining cumin seeds. When the seeds begin to splutter add the lentils, ginger, turmeric and green chilli along with salt to taste.
Close the pressure cooker and cook on a High flame. After the pressure cooker starts letting off steam, reduce the heat to Medium and cook for around four minutes.
Turn the flame off and wait for the steam release to stop. Then open the cooker. The lentils should be well-cooked and soft – but not pulpy.
Now add the mango powder, garam masala and black pepper. Mix well.
Take six serving plates. On each plate, place two puris. Put a dollop of the Dal on each puri and apply a topping of tamarind chutney.
Your Dal Pakwan Chaat is now ready to be served. The best way to enjoy this is to sit down with a cup of steaming hot tea and a plate of this delicious Chaat. Life is good!